安装gpg

windows

https://www.gpg4win.org/

生成密钥

1
gpg --gen-key

查看密钥

1
gpg --list-keys

导出公钥

1
gpg --export --armor 邮箱 > 公钥文件名

导入公钥

1
gpg --import 公钥文件名

签名

1
gpg --sign --armor 文件名

验证

1
gpg --verify 文件名.asc

配置git

1
2
3
4
5
6
7
8
git config --global user.signingkey 密钥ID
git config --global commit.gpgsign true

# 配置gpg程序路径
git config --global gpg.program "C:\Program Files (x86)\GnuPG\bin\gpg.exe"

# 配置git提交签名
git config commit.gpgsign true

密钥ID为上一步生成的密钥ID的后8位

在路径
C:\Users\Administrator 下找到 .gitconfig,复制一份,重命名为 .gitconfig-gitlab

.gitconfig 内容如下:

1
2
3
4
5
6
7
8
9
10
11
12
13
14
15
16
17
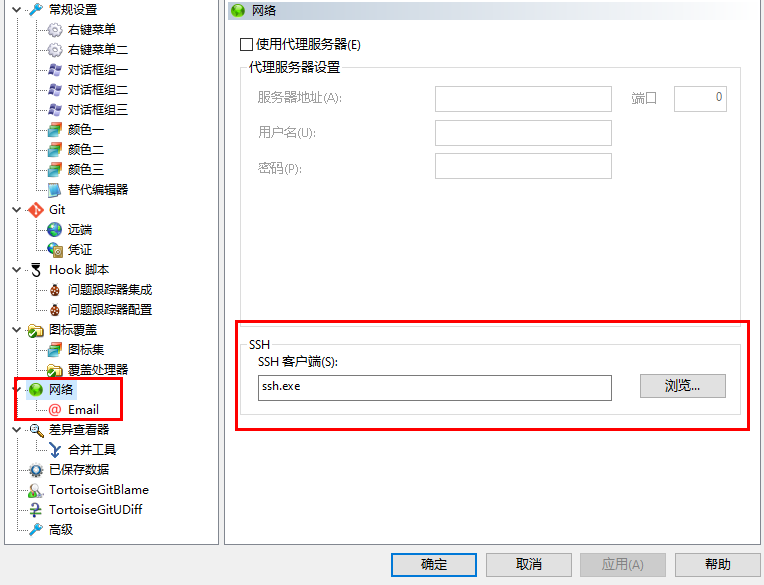
[user]
name = xxxxxx
email = xxxxxx@qq.com

# The contents of this file are included only for GitLab.com URLs
[includeIf "hasconfig:remote.*.url:https://gitlab.xxxxx.com/**"]
[includeIf "hasconfig:remote.*.url:https://github.com/**"]

# Edit this line to point to your alternative configuration file
path = ~/.gitconfig-gitlab
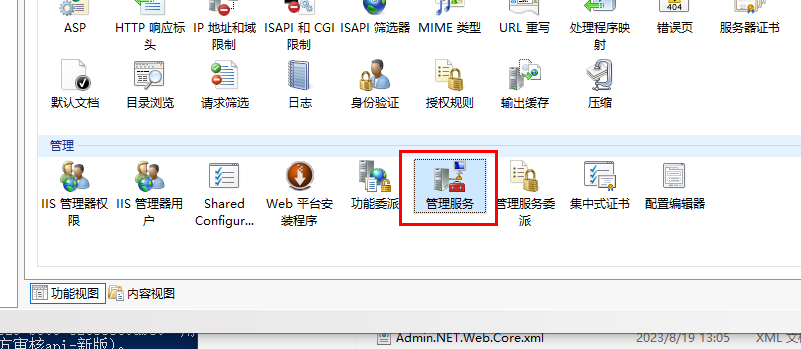
path = ~/.gitconfig-github

[commit]
gpgsign = false
[gpg]
program = C:\\Program Files (x86)\\GnuPG\\bin\\gpg.exe

.gitconfig-gitlab 内容如下:

1
2
3
4
5
6
7
[user]
name = xx
email = xxx@xxx.com
signingkey = 密钥ID
[commit]
gpgsign = true

配置github

  1. 复制公钥
  2. 登录github
  3. Settings -> SSH and GPG keys -> New GPG key
  4. 粘贴公钥
  5. 测试
    1
    git commit -S -m "测试"
  6. 推送
    1
    git push
  7. 查看
    1
    git log --show-signature

RSA

1
2
3
4
5
6
7
8
9
10
# 查看md5签名
openssl x509 -in 1.crt -modulus -noout | openssl md5
openssl rsa -in 1.key -modulus -noout | openssl md5

# 生成公钥
openssl x509 -pubkey -in 1.crt -noout > pub1.crt
openssl rsa -in 1.key -pubout -out pub1.key

# 比较公钥
diff pub1.crt pub1.key

ECDSA

1
2
3
4
5
6
7
8
9
openssl x509 -noout -modulus -in test.com-cert.pem | openssl md5
openssl ec -noout -modulus -in test.com-key.pem | openssl md5

# 生成公钥
openssl pkey -in hdvr-key.key -pubout -out pubkey1.pem |
openssl x509 -pubkey -noout -in hdvr-cert.pem > cert_pubkey1.pem

# 比较公钥
diff cert_pubkey1.pem pubkey1.pem

安装

Snipaste_2024-08-07_08-39-02.png

Snipaste_2024-08-07_08-39-32.png

Snipaste_2024-08-07_08-39-56.png

配置

新建用户

执行一下命令,创建 Admin 用户:

1
2
3
4
5
6
7
8
9
10
11
use admin
db.createUser(
{
user: "Admin",
pwd: passwordPrompt(), // or cleartext password
roles: [
{ role: "userAdminAnyDatabase", db: "admin" },
{ role: "readWriteAnyDatabase", db: "admin" }
]
}
)

C:\Program Files\MongoDB\Server\7.0\bin 目录下,找到 mongod.cfg 文件,添加以下内容,启用身份验证:

1
2
security:
authorization: "enabled"

之后重启 MongoDB 服务。

Snipaste_2024-08-07_08-47-43.png

测试连接

1
2
# 验证用户
db.auth("Admin", passwordPrompt())

Snipaste_2024-08-07_08-52-29.png

GitBash 的 shell 命令行工具,可以试用grep命令过滤:

注意,需要把 adb.exe 添加到环境变量中,如下:

Snipaste_2023-10-12_14-16-36.png

1
2
3
4
5
6
7
8
9
10
11
12
# 产设备列表
adb.exe devices

# 显示手机已安装应用目录
# -s 设备名
adb.exe -s 340782513600AP8 shell pm list packages -3

# 过滤com.test.masablazorapp包日志
adb.exe -s 340782513600AP8 logcat | grep com.test.masablazorapp

# 把日志保存到指定目录
adb.exe -s 340782513600AP8 logcat -v time > e:\log.txt *:E
阅读全文 »

方法1

Snipaste_2023-10-08_15-32-57.png

加载 PuTTYgen生成的私钥,导出openssh的秘钥:

Snipaste_2023-10-08_15-34-10.png

保存文件名为id_rsa的文件,不需要拓展名(保存到 c:\用户\用户名\.ssh,即Git默认的ssh存储地址)

保存公钥:将配置 TortoiseGit 密钥时的公钥,复制一份,保存到c:\用户\用户名\.ssh,命名为id_rsa.pub。当然也可以就着上一步私钥转换的时候,直接保存公钥到默认文件夹。

这样,相当于配置了一回 Git 的 SSH (不通过 ssh-keygen -t rsa-C “邮箱” 命令配置,而是通过 PuTTYgen 将 TortoiseGit 的密钥转换成合适的格式) ,让 openSSH 与 PuTTY 使用相同的密钥,Git Bash 使用 openSSH 连接,而 TortoiseGit 使用 PuTTY 连接,互相不干扰。

方法2

TortoiseGit–> Settings,将Network(网络)中的SSH client(SSH客户端)改为Git目录下的ssh.exe(C:\Program Files\Git\usr\bin)。

Snipaste_2023-10-08_15-50-28.png

方法3

重新运行向导

C:\Program Files\Git\usr\bin

配置多个ssh

找到 C:\Program Files\Git\etc\ssh目录,找到 ssh_config,在文件最后一行添加:

1
2
3
4
5
6
7
Host github.com
User syxdevcode
HostName github.com
PreferredAuthentications publickey
IdentityFile ~/.ssh/github_rsa
ServerAliveInterval 300
ServerAliveCountMax 10

错误排查

no matching host key type found. Their offer: ssh-rsa,ssh-dss

找到 C:\Program Files\Git\etc\ssh目录,找到 ssh_config,在文件最后一行添加

1
2
3
4
Host *
KexAlgorithms +diffie-hellman-group1-sha1
HostkeyAlgorithms +ssh-dss,ssh-rsa
PubkeyAcceptedKeyTypes +ssh-dss,ssh-rsa

Powershell脚本

在服务器创建 deploy.ps1 powershell脚本,具体代码如下:
注意:前端代码的备份文件夹的上级目录需要手动创建一次。

1
2
3
4
5
6
7
8
9
10
11
12
13
14
15
16
17
18
19
20
21
22
23
24
25
26
27
28
29
30
31
32
33
34
35
36
37
38
39
40
41
42
43
44
45
46
47
48
49
50
51
52
53
54
55
56
57
58
## IIS站点发布
cd "D:\Git\workspace\mywebsite\Admin.NET"
dotnet publish -p:PublishDir=D:\Git\publish\mywebsite --arch x64
$website="mywebsiteApiNew" # 站点名称
$sourceFolder='D:\Git\publish\mywebsite' # 发布的源文件路径
$url="10.10.0.3"
$port="8100"
$username="test" #需要在IIS管理用户中进行创建
$password="123123"
$webDeployFolder='C:\Program Files\IIS\Microsoft Web Deploy V3'
$msdeploy=Join-Path -Path $webDeployFolder -ChildPath "msdeploy.exe"
$scriptFolder=Join-Path -Path $webDeployFolder -ChildPath "Scripts"
cd "$scriptFolder"
. .\BackupScripts.ps1
# Turns on all backup functionality
TurnOn-Backups -On $true # 启用备份
# Turns off all backup functionality
# TurnOn-Backups -On $false # 关闭备份
# Changes default global backup behavior to enabled
Configure-Backups -Enabled $true
# Changes default backup behavior for site to enabled
Configure-Backups -SiteName "$website" -Enabled $true
# Changes the path of where backups are stored to a sibling directory named "siteName_snapshots".
# For more information about path variables, see the "backupPath" attribute in the section
# "Configuring Backup Settings on the Server for Global usage manually in IIS Config"
Configure-Backups -BackupPath "{SitePathParent}\{siteName}_snapshots"
# 最大备份文件数 Configures default backup limit to 5 backups
Configure-Backups -NumberOfBackups 8
# Configures sync behavior to fail if a sync fails for any reason
Configure-Backups -ContinueSyncOnBackupFailure $false
# Adds providers to skip when performing a backup
Configure-Backups -AddExcludedProviders @("dbmysql","dbfullsql")
# StopAppPool:
& $msdeploy -verb:sync -allowUntrusted -source:recycleApp -dest:recycleApp="$website",recycleMode="StopAppPool",computerName="https://${url}:${port}/msdeploy.axd?site=$website",username="$username",password="$password",AuthType="Basic"
# sync
& $msdeploy -verb:sync -allowUntrusted -source:contentPath=$sourceFolder -dest:contentPath="$website/",computerName="https://${url}:${port}/msdeploy.axd?site=$website",username="$username",password="$password",AuthType="Basic" -skip:objectName=dirPath,absolutePath='Configuration' -skip:objectName=dirPath,absolutePath='logs'
# StartAppPool:
& $msdeploy -verb:sync -allowUntrusted -source:recycleApp -dest:recycleApp="$website",recycleMode="StartAppPool",computerName="https://${url}:${port}/msdeploy.axd?site=$website",username="$username",password="$password",AuthType="Basic"
# 前端站点发布
# vue nginx 站点发布
$baseDir="D:\Git\workspace\mywebsite\Web"
& cd $baseDir
& yarn build
$sourceFolder=Join-Path -Path $baseDir -ChildPath "dist" # 源文件
$webSiteFolder="D:\WebSite\mywebsiteNew" # 站点根目录
$webSiteFolder
$destFolder=Join-Path -Path $webSiteFolder -ChildPath "web" # 手动创建web目录
$destFolder
$backFolder=Join-Path -Path $webSiteFolder -ChildPath "web_back" # 手动创建web_back目录
$backFolder
$now=Get-Date -Format "yyyy-MM-dd_HHmmss"
$backFileName=-join ($now,".zip")
$fullFolder=Join-Path -Path $backFolder -ChildPath $backFileName
Compress-Archive -Path $destFolder -DestinationPath $fullFolder -Force # 1,备份成压缩包
$removeFolder=-join($destFolder,"\*")
Remove-Item $removeFolder -Recurse -Force # 2,删除 原站点 所有文件/文件夹
$fullSourceFolder=-join ($sourceFolder,"\*")
Copy-Item -Path $fullSourceFolder -Destination $destFolder -Recurse # 3,复制新文件

在 Jenkins => Build Steps 中配置 PowerShell脚本如下:

1
2
3
4
$webSiteFolder="D:\Git\workspace\mywebsite" # 站点根目录
$webSiteFolder
& cd $webSiteFolder
. .\deploy.ps1

PowerShell脚本

脚本中使用到了 yarn 工具,需要提前在系统中安装。

1
2
3
4
5
6
7
8
9
10
11
12
13
14
15
16
17
18
19
# vue nginx 站点发布
$baseDir="D:\Git\workspace\mywebsite\Web"
& cd $baseDir
& yarn build
$sourceFolder=Join-Path -Path $baseDir -ChildPath "dist" # 源文件
$webSiteFolder="D:\WebSite\mywebsite" # 站点根目录
$webSiteFolder
$destFolder=Join-Path -Path $webSiteFolder -ChildPath "web" # 手动创建web目录
$destFolder
$backFolder=Join-Path -Path $webSiteFolder -ChildPath "web_back" # 手动创建web_back目录
$backFolder
$now=Get-Date -Format "yyyy-MM-dd_HHmmss"
$backFileName=-join ($now,".zip")
$fullFolder=Join-Path -Path $backFolder -ChildPath $backFileName
Compress-Archive -Path $destFolder -DestinationPath $fullFolder -Force # 1,备份成压缩包
$removeFolder=-join($destFolder,"\*")
Remove-Item $removeFolder -Recurse -Force # 2,删除 原站点 所有文件/文件夹
$fullSourceFolder=-join ($sourceFolder,"\*")
Copy-Item -Path $fullSourceFolder -Destination $destFolder -Recurse # 3,复制新文件

参考:

使用PowerShell压缩和解压ZIP包

配置Windows Server服务器

安装.NET SDK

在服务器上下载安装 .NET SDK。

下载地址: 下载 .NET 6.0

安装WebDeploy

下载地址:web-deploy下载

通过选择“自定义”选项来激活“IIS 部署处理程序”功能。

Snipaste_2023-08-19_14-09-17.png

WebDeploy默认监听8172端口,可以按照以下操作自定义端口号:

Snipaste_2023-08-19_14-11-13.png

先停止服务,然后在修改端口,之前启动即可。

Snipaste_2023-08-19_14-11-59.png

阅读全文 »

简介

Jenkins是一个开源的、提供友好操作界面的持续集成(CI)工具,起源于Hudson(Hudson是商用的),主要用于持续、自动的构建/测试软件项目、监控外部任务的运行。Jenkins用Java语言编写,可在Tomcat等流行的servlet容器中运行,也可独立运行。通常与版本管理工具(SCM)、构建工具结合使用。常用的版本控制工具有SVN、GIT,构建工具有Maven、Ant、Gradle。

阅读全文 »
0%